

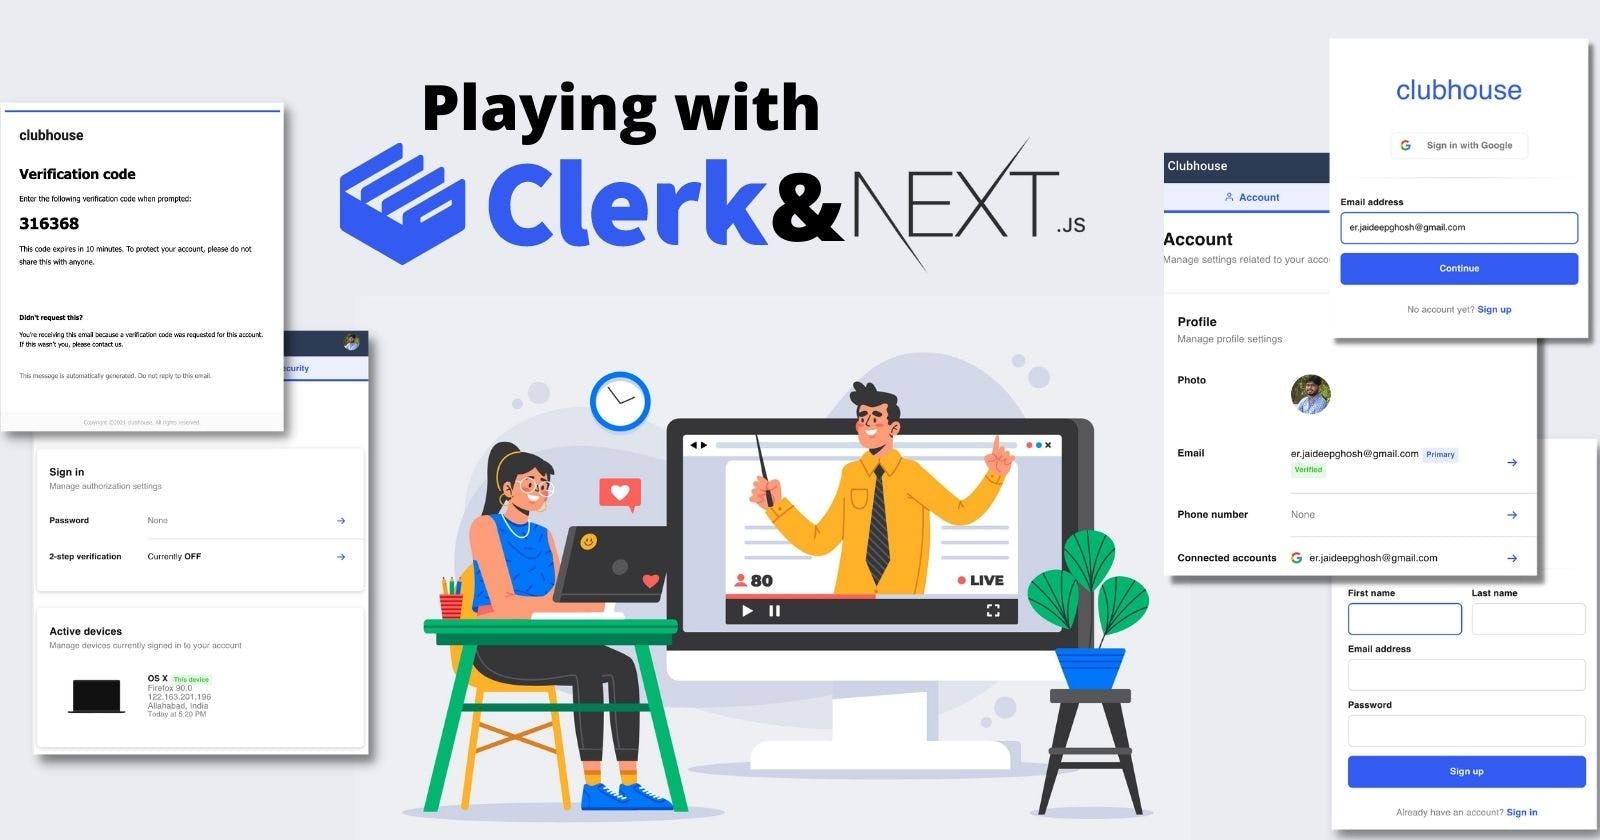
Playing with Clerk and Next.js
To develop Clubhouse - An open-source learning platform


In order to understand how clerk helps we are going to develop an app on next.js with clerk.
Create a next.js project by executing
npx create-next-app clubhouse
You can preview your next.js app by executing
npm run dev
Now let's remove all the unnecessary template UI elements. by doing this, the content of your pages/index.js will be:
export default function Home() {
  return (
    <></>
  )
}
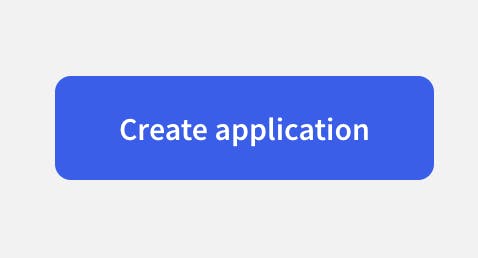
Now let's configure Clerk by visiting https://dashboard.clerk.dev/applications
Click on Create application button:
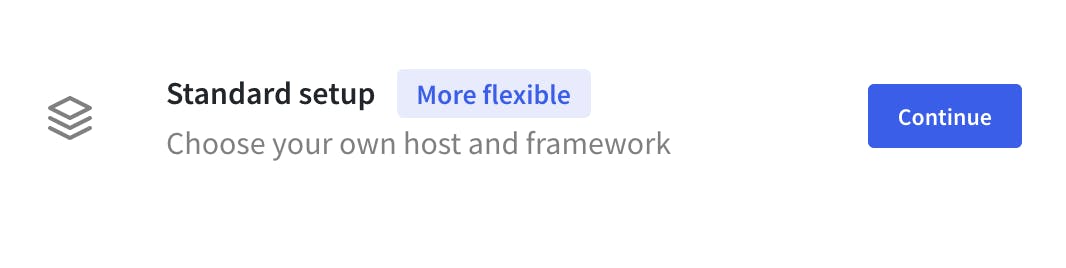
Select standard setup
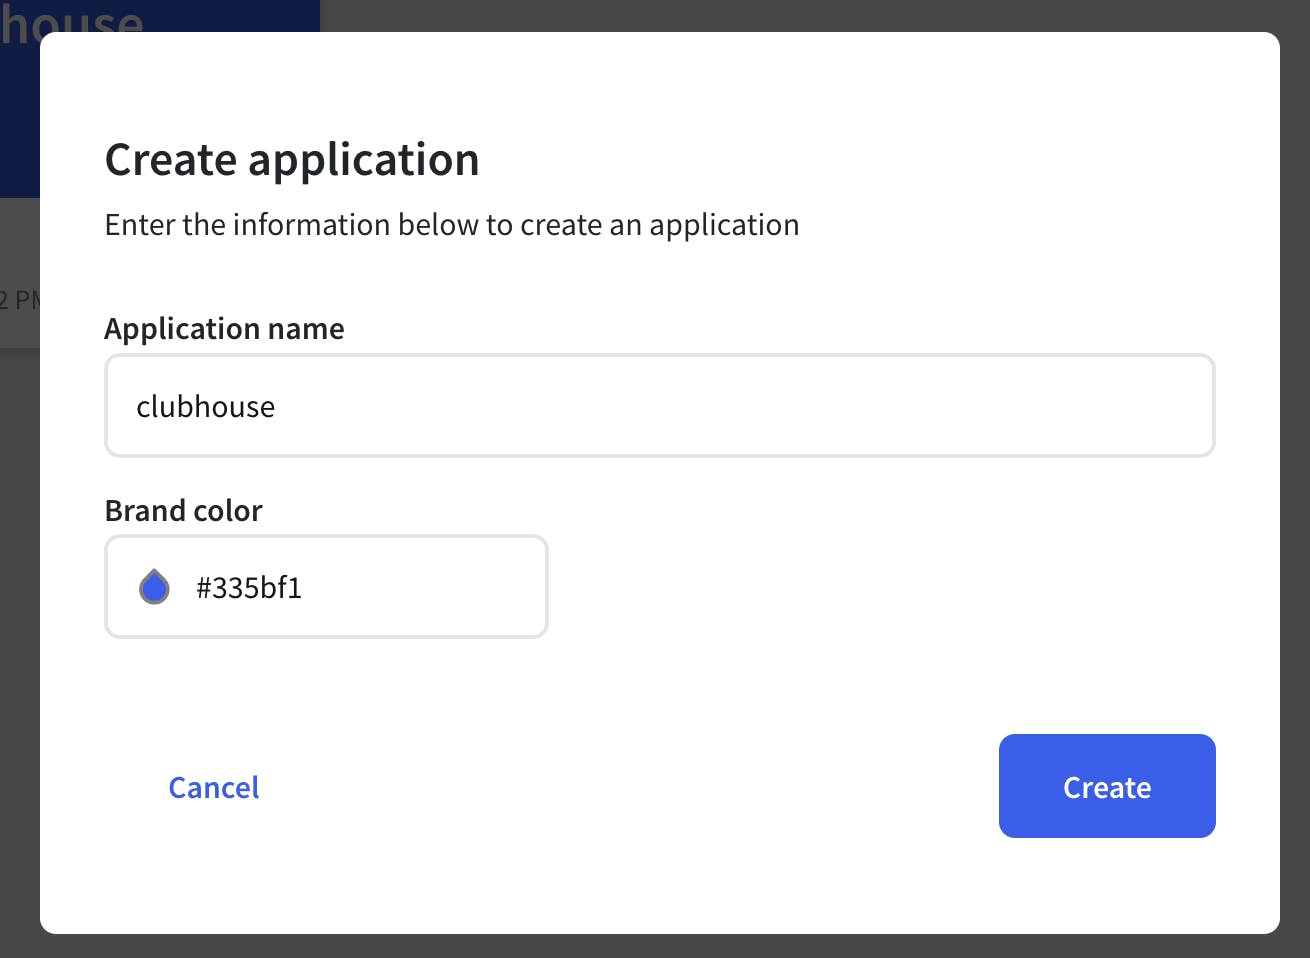
Enter application name and choose a brand color.
You will see your created project with two environment, production and development.
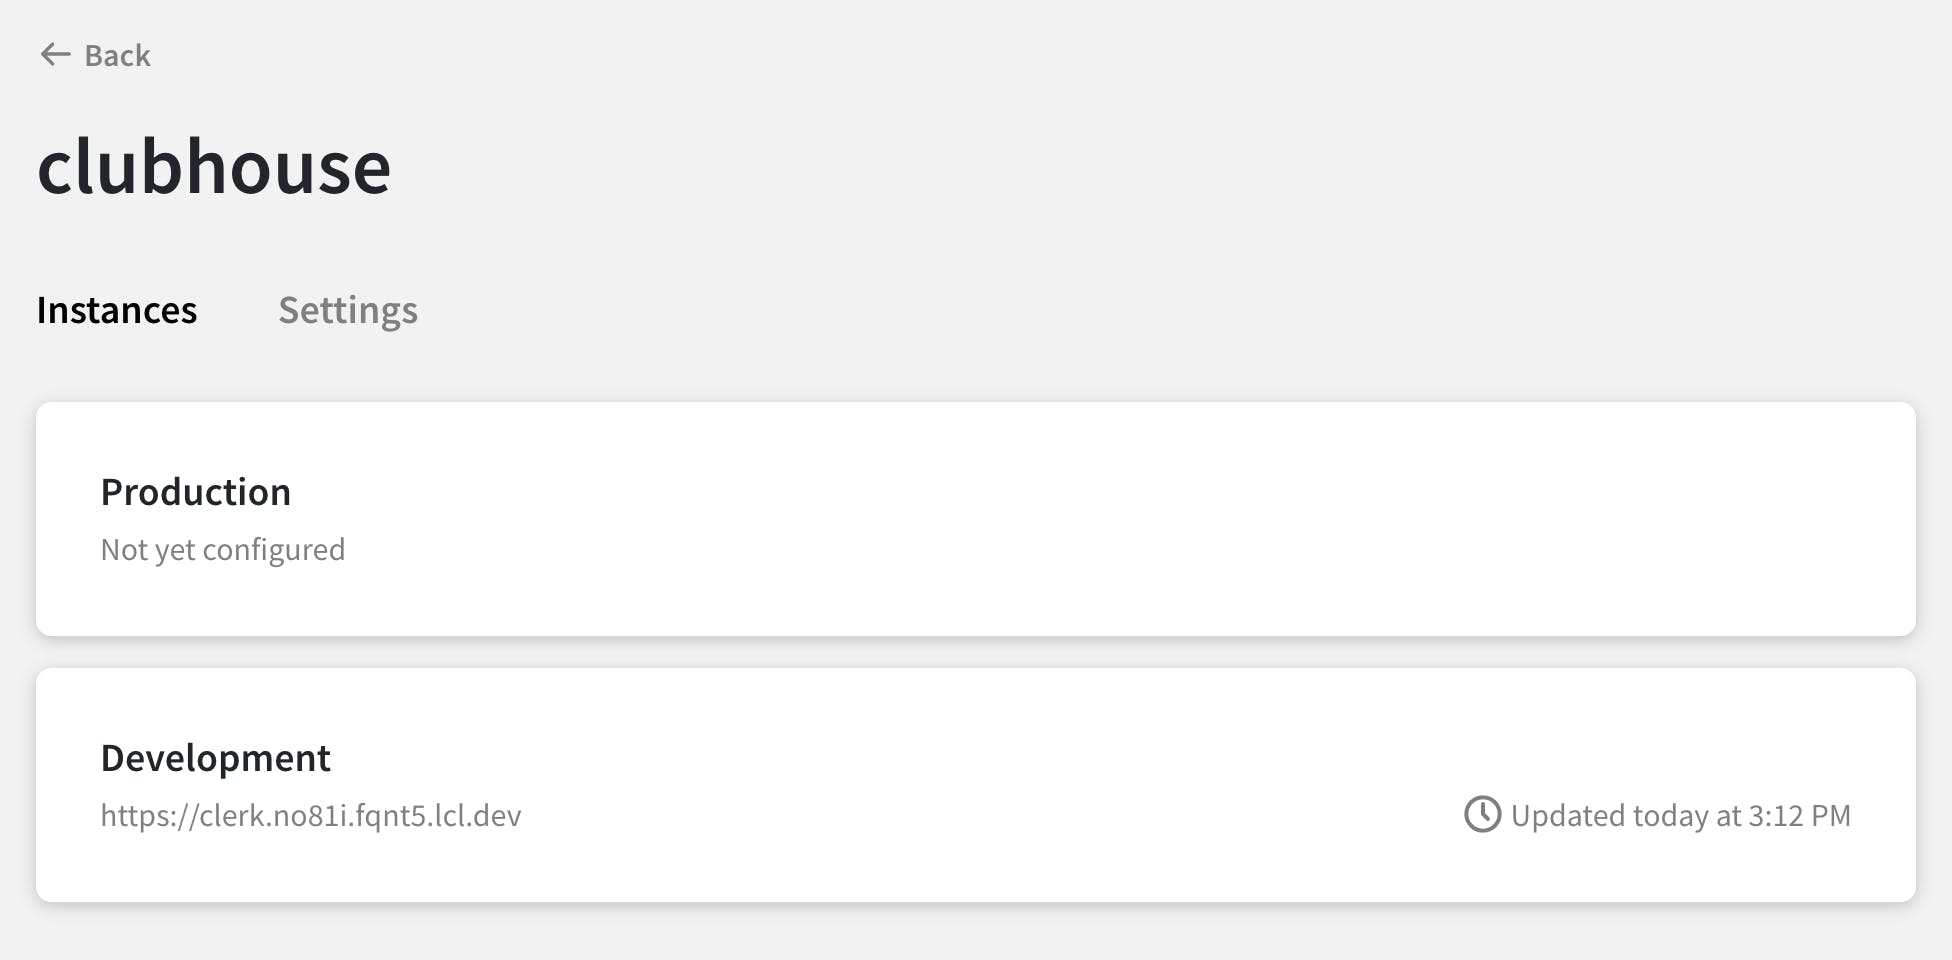
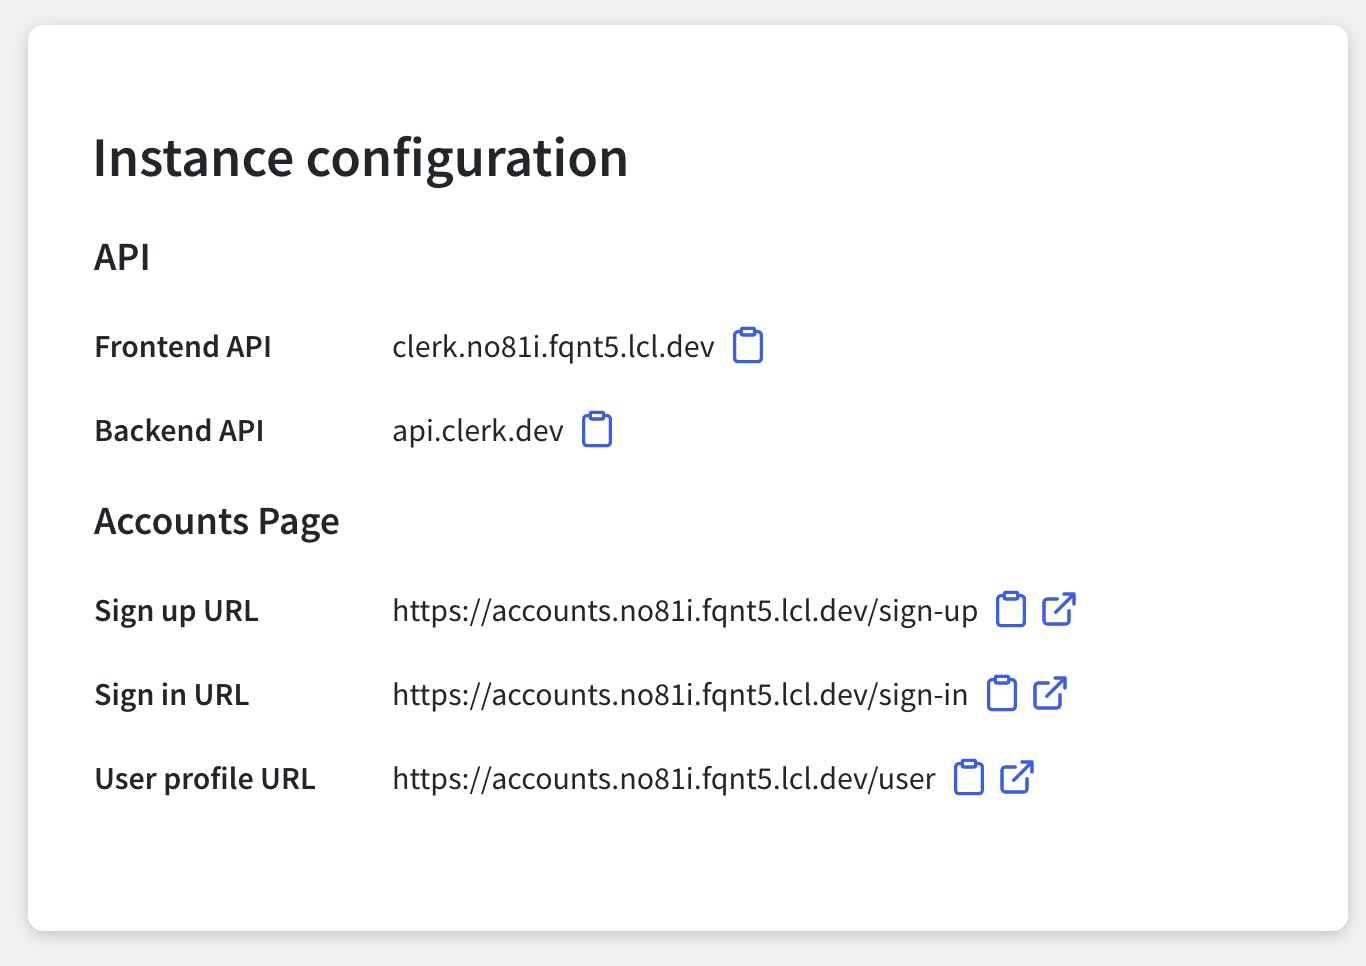
Select the environment, and scroll down to the instance configuration block
Now we have to include the clerk package in our next.js app, So let's execute the npm command:
npm i @clerk/clerk-react
For styling and icons, let's use material-ui. Install the npm package by executing:
npm install @material-ui/core @material-ui/icons
Create a header component components/Header.js with the following content:
import React from 'react';
import { makeStyles } from '@material-ui/core/styles';
import AppBar from '@material-ui/core/AppBar';
import Toolbar from '@material-ui/core/Toolbar';
import IconButton from '@material-ui/core/IconButton';
import Typography from '@material-ui/core/Typography';
import LockOpenIcon from '@material-ui/icons/LockOpen';
import Link from "next/link";
import { SignedIn, SignedOut, UserButton } from "@clerk/clerk-react";

const useStyles = makeStyles((theme) => ({
  grow: {
    flexGrow: 1,
  },
  appBar: {
    background: '#2E3B55'
  }
}));

export default function Header() {
  const classes = useStyles();
  const menuId = 'primary-search-account-menu';

  return (
    <div className={classes.grow}>
      <AppBar position="static" className={classes.appBar}>
        <Toolbar variant="dense">
          <Link href="/" passHref>
          <Typography variant="h6" noWrap>
            Clubhouse
          </Typography>
          </Link>
          <div className={classes.grow} />
          <div>
            <IconButton
              edge="end"
              aria-label="account of current user"
              aria-controls={menuId}
              aria-haspopup="true"
              color="inherit"
            >
              <SignedOut>
                <Link href="/login" title="Login" passHref>
                  <LockOpenIcon/>
                </Link>
              </SignedOut>
              <SignedIn>
                <UserButton />
              </SignedIn>
            </IconButton>
          </div>
        </Toolbar>
      </AppBar>
    </div>
  );
}
It will create an app-bar with app-name and user-avatar/login-icon.

In this component, import { SignedIn, SignedOut, UserButton } from "@clerk/clerk-react"; includes the conditional rendering child which shows a user avatar or login icon depending upon the user session.
              <SignedOut>
                <Link href="/login" title="Login" passHref>
                  <LockOpenIcon/>
                </Link>
              </SignedOut>
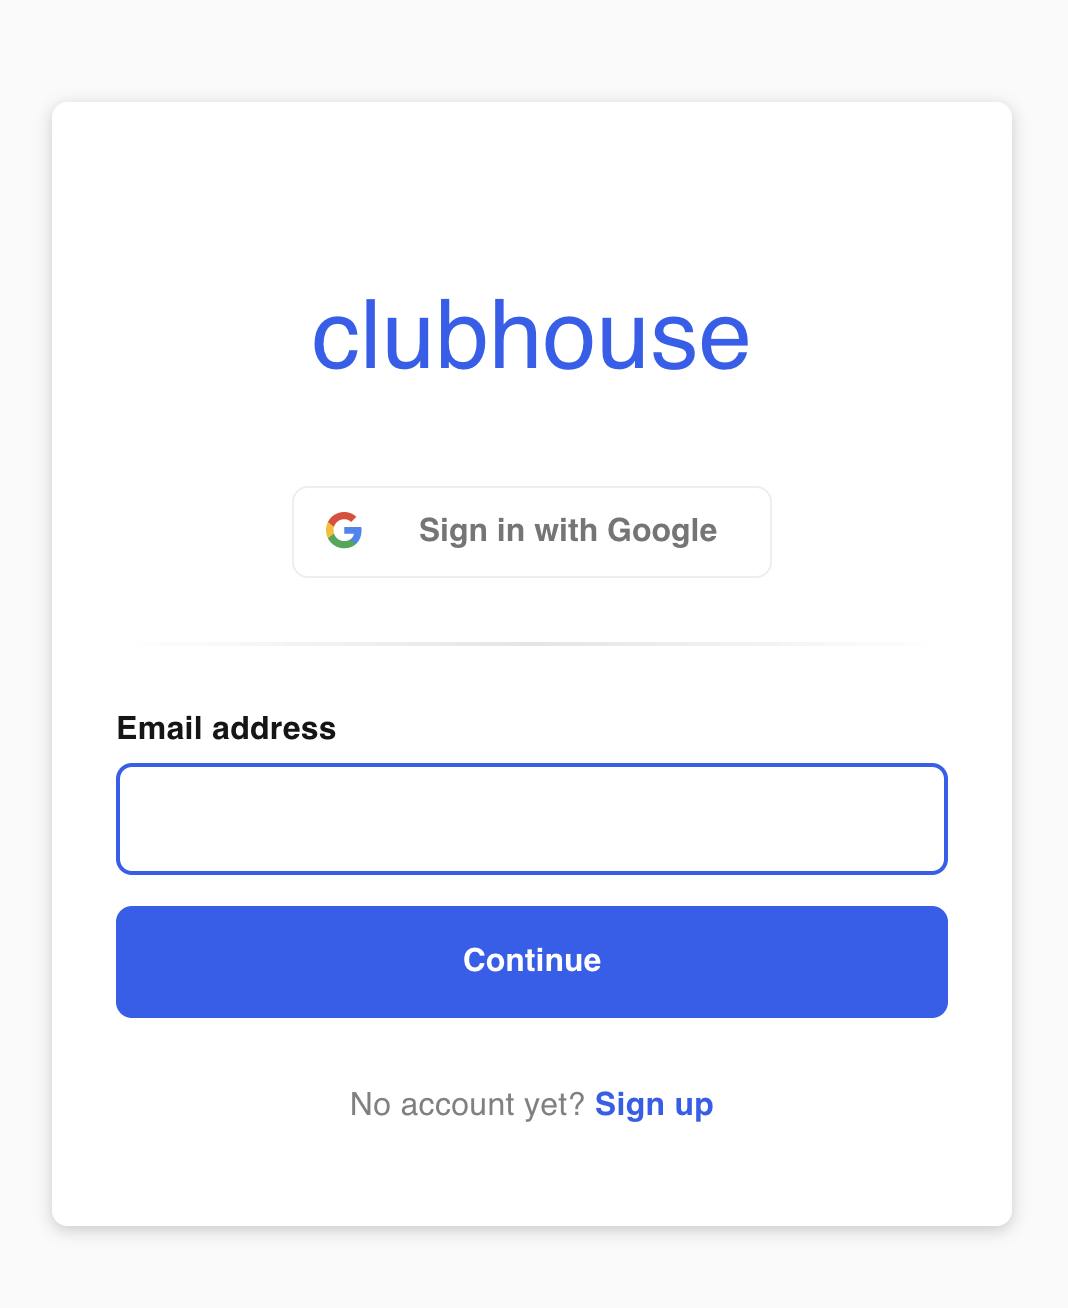
The above implementation is used to show Login-Icon, and on-click of the icon, user will be redirected to the login screen.
              <SignedIn>
                <UserButton />
              </SignedIn>
            </IconButton>
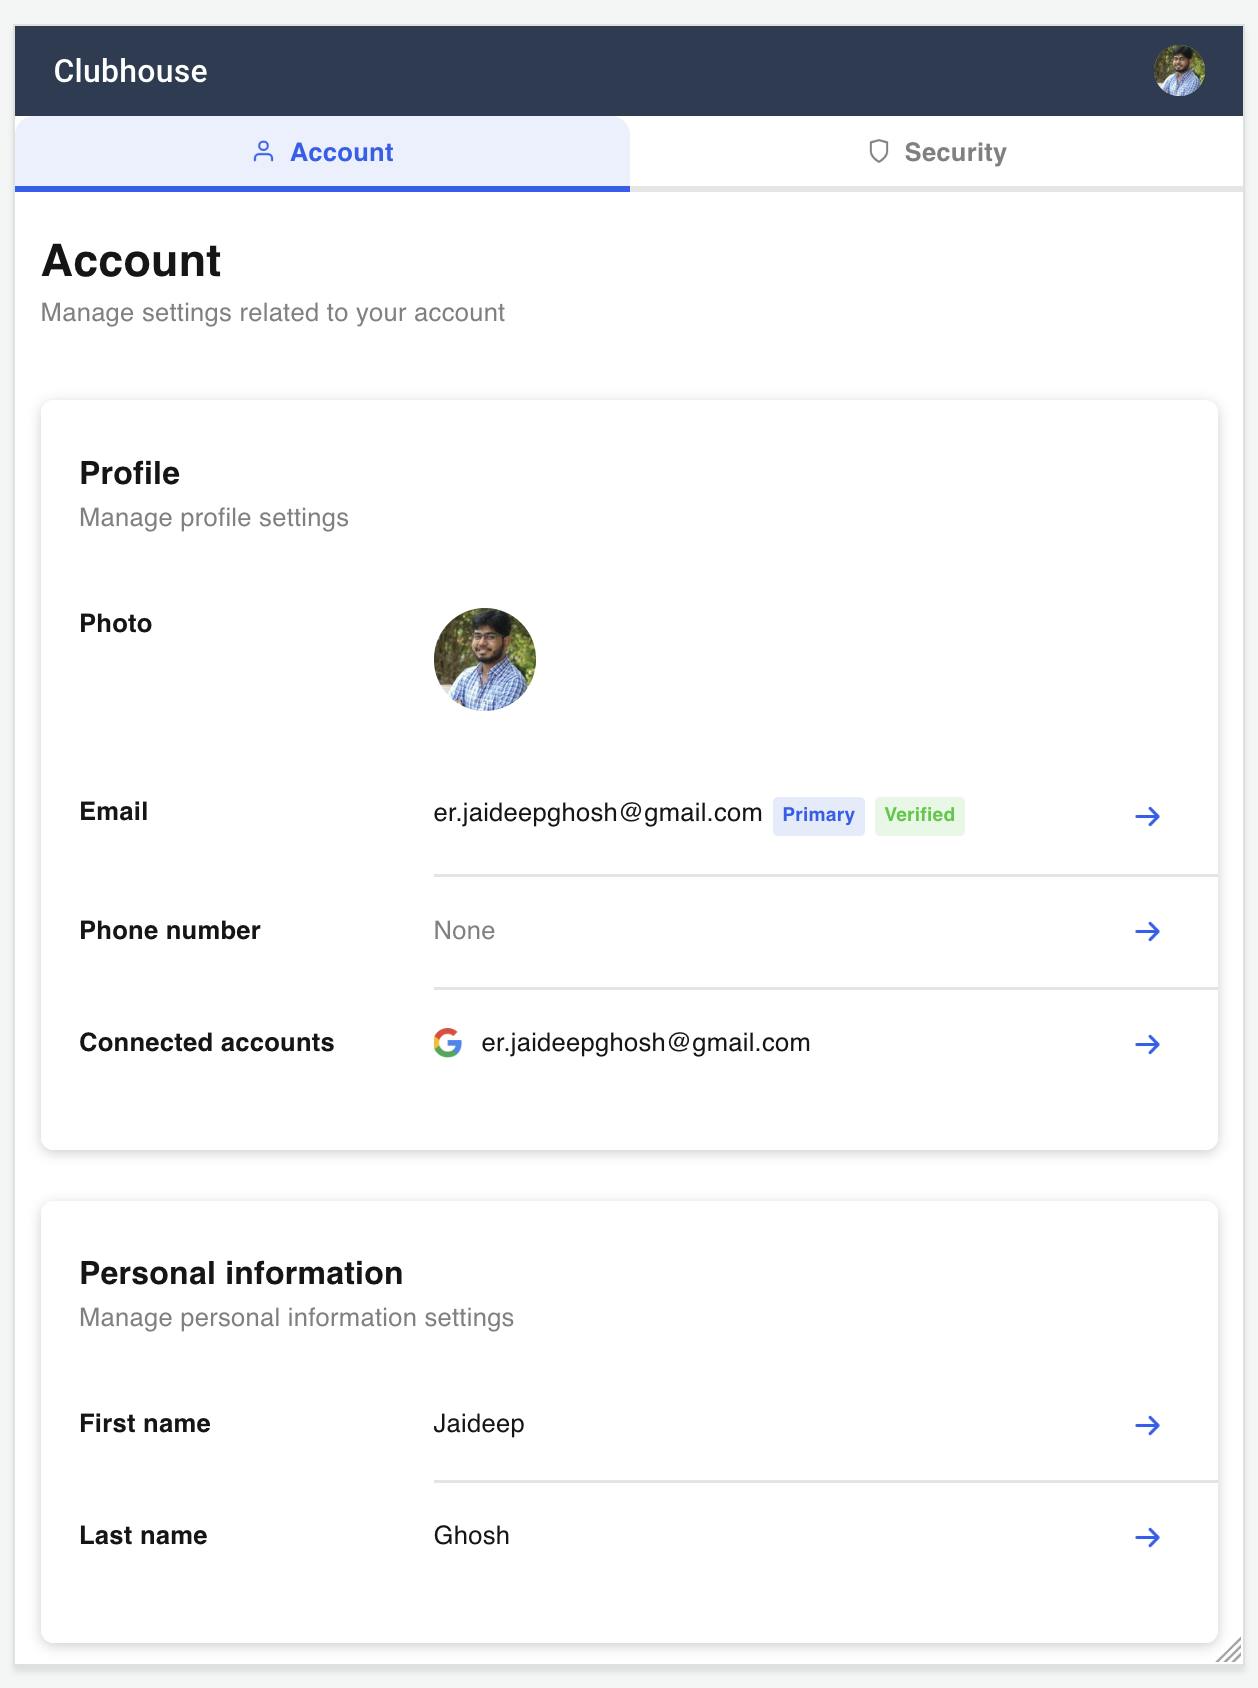
The above implementation is used to show the avatar of the logged-in user. On-click of this avatar, it shows a component with manage account, and logout option as below:
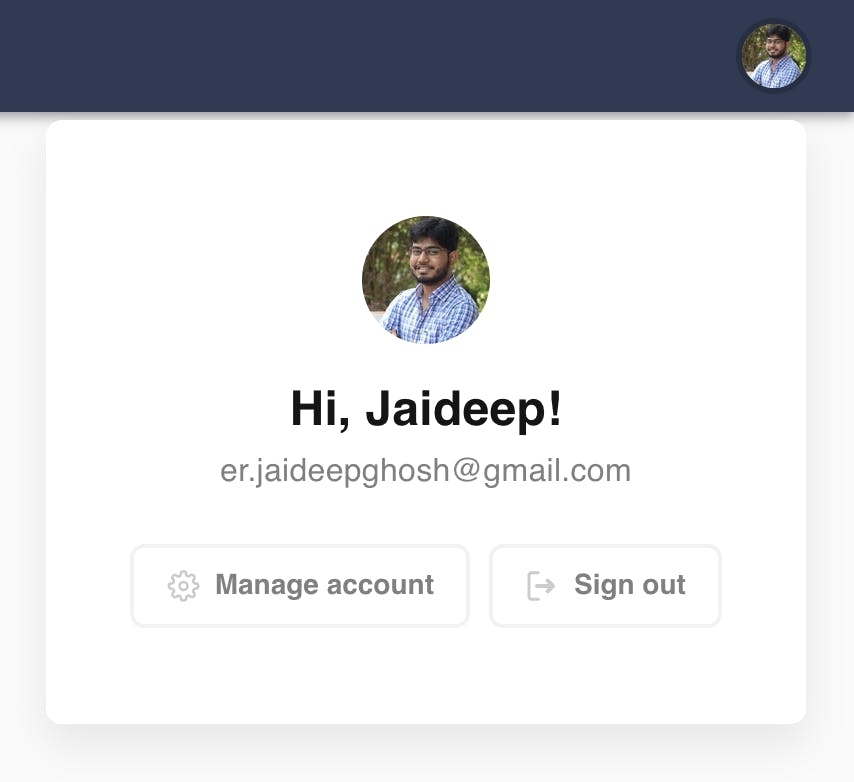
By default, when a user clicks on the login button, or Manage Account or logout, They always land on the clerk's given account page URLs. See below for your reference:
If you want to keep your users, in your application, and don't want t redirect them to clerk's url, then make the following changes in the Clerk's app setting.
In https://dashboard.clerk.dev/ Go to settings, and then select URL & redirects.
Make the following changes, and click on Apply changes.
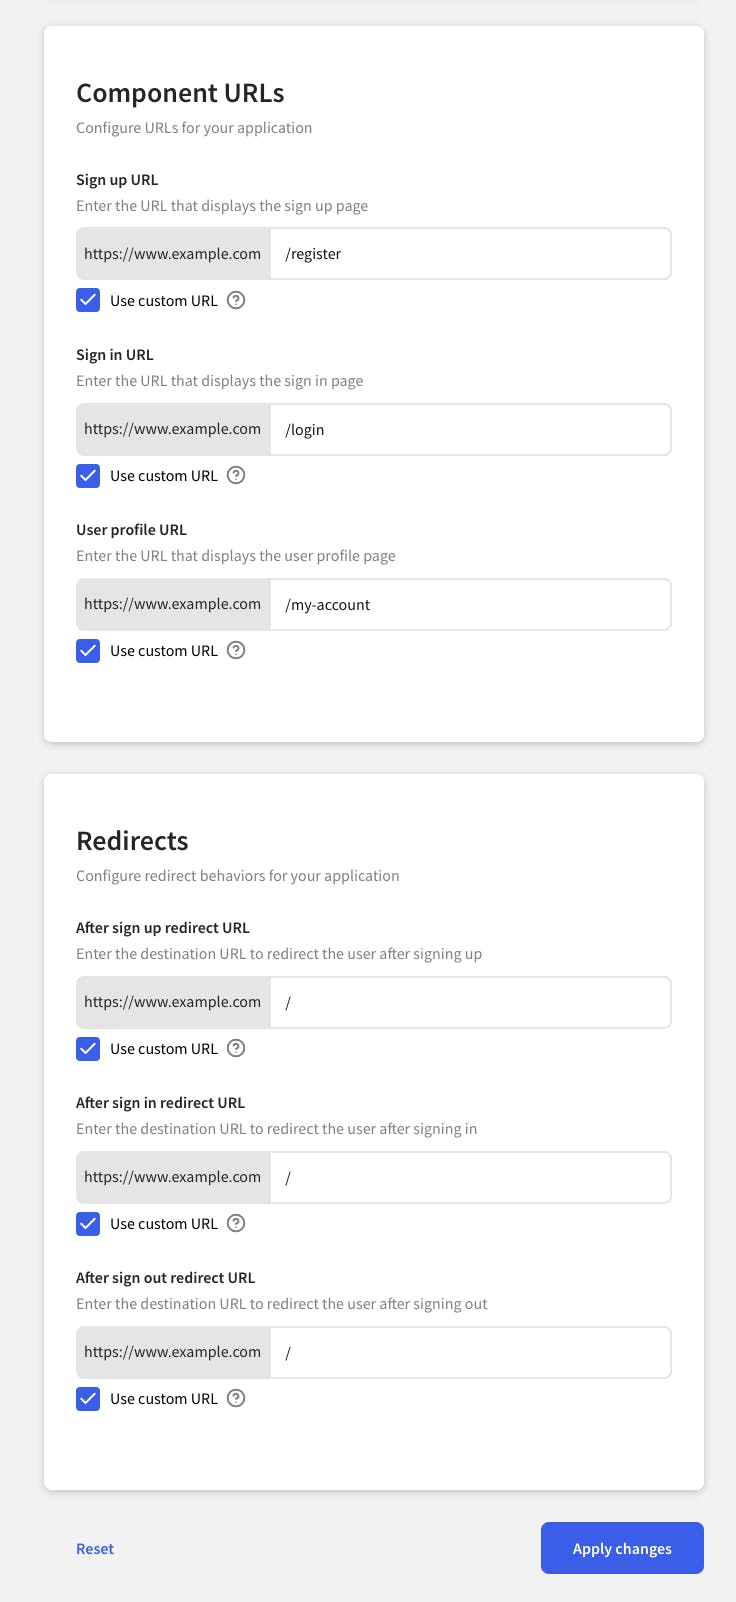
Let's assume our app is hosted on example.com, then by making the above changes, now when the user clicks on login they will be redirected to example.com/login. When the user clicks on Manage Account they will be redirected to example.com/my-account, and when the user clicks on Signup they will be redirected to example.com/register.
In order to handle the routes in our application, we have to create custom pages for login, my-account and register component.
Create a file pages/login/[[...index]].js with the following contents:
import React from 'react';
import { SignIn } from "@clerk/clerk-react";
import CssBaseline from '@material-ui/core/CssBaseline';
import { makeStyles } from '@material-ui/core/styles';
import Container from '@material-ui/core/Container';

const useStyles = makeStyles((theme) => ({
  paper: {
    marginTop: theme.spacing(8),
    display: 'flex',
    flexDirection: 'column',
    alignItems: 'center',
  },
  avatar: {
    margin: theme.spacing(1),
    backgroundColor: theme.palette.secondary.main,
  },
  form: {
    width: '100%', // Fix IE 11 issue.
    marginTop: theme.spacing(1),
  },
  submit: {
    margin: theme.spacing(3, 0, 2),
  },
}));

export default function Login() {
  const classes = useStyles();

  return (
    <Container component="main" maxWidth="xs">
      <CssBaseline />
      <div className={classes.paper}>
        <SignIn path="/login" routing="path" />
      </div>
    </Container>
  );
}
In the above snippet, the line <SignIn path="/login" routing="path" /> is responsible for showing the login UI and its controls.
Create a file pages/my-account/[[...index]].js with the following contents:
import { UserProfile } from "@clerk/clerk-react";
import React from 'react';
import CssBaseline from '@material-ui/core/CssBaseline';
import Header from "../../components/Header";

export default function UserProfilePage() {
  return (
    <>
      <CssBaseline />
      <Header />
      <UserProfile path="/my-account" routing="path" />
    </>
  );
}
The above implementation will show a my-account component.
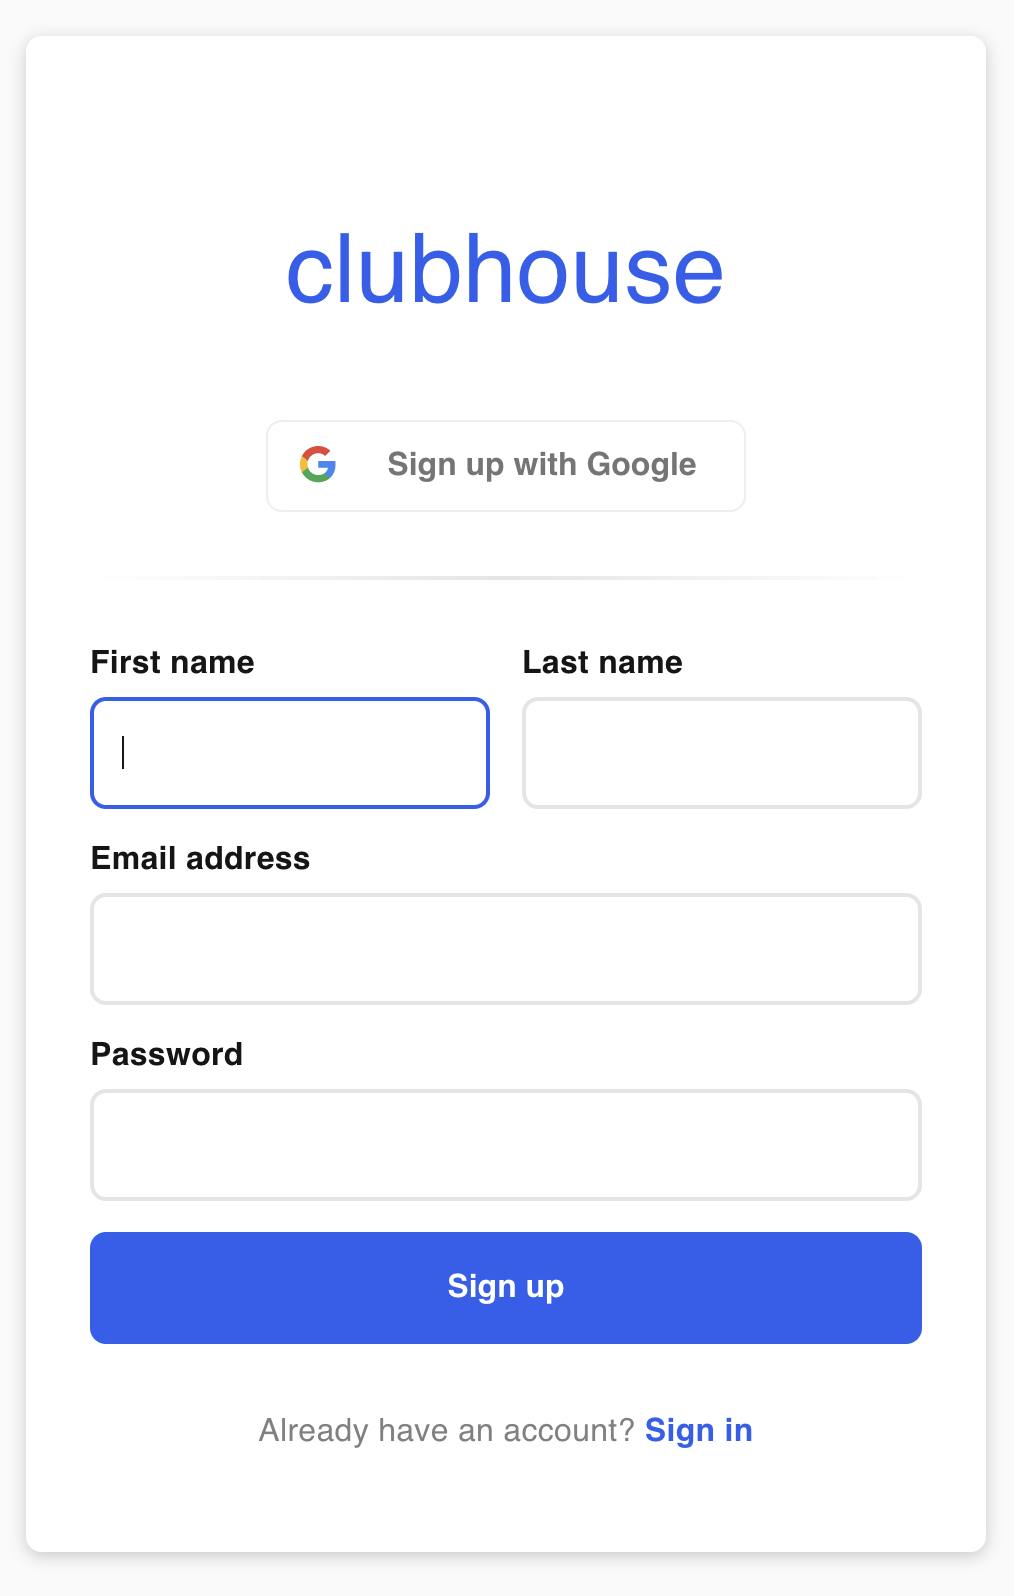
Create a file pages/register/[[...index]].js with the following contents:
import React from 'react';
import { SignUp } from "@clerk/clerk-react";
import CssBaseline from '@material-ui/core/CssBaseline';
import { makeStyles } from '@material-ui/core/styles';
import Container from '@material-ui/core/Container';

const useStyles = makeStyles((theme) => ({
  paper: {
    marginTop: theme.spacing(8),
    display: 'flex',
    flexDirection: 'column',
    alignItems: 'center',
  },
  avatar: {
    margin: theme.spacing(1),
    backgroundColor: theme.palette.secondary.main,
  },
  form: {
    width: '100%', // Fix IE 11 issue.
    marginTop: theme.spacing(1),
  },
  submit: {
    margin: theme.spacing(3, 0, 2),
  },
}));

export default function Login() {
  const classes = useStyles();

  return (
    <Container component="main" maxWidth="xs">
      <CssBaseline />
      <div className={classes.paper}>
        <SignUp path="/register" routing="path" />
      </div>
    </Container>
  );
}
Now we are all set to have our own UIs to show based on user session.
In our app, wherever a guest content is to be shown, can be wrapped with <SignedOut></SignedOut>. And all the components which should be visible only to the session user, can be wrapped in <SignedIn></SignedIn>
Follow clerk's official documentation for more information.
Github repo
https://github.com/jaideepghosh/clubhouse
Demo
https://clerkhouse.netlify.app/
#ClerkDev #ClerkHackathon